
Working on kitchen counters without proper lighting turns simple tasks into guesswork. Shadows from overhead fixtures fall exactly where hands and cutting boards sit, making prep work frustrating and potentially unsafe. Under counter lighting solves this problem by placing light directly on work surfaces, eliminating shadows and improving visibility where it matters most. This guide covers the types of fixtures available, how to choose the right option for a specific kitchen layout, and step-by-step installation instructions for homeowners ready to tackle the project themselves.
Table of Contents
ToggleKey Takeaways
- Under counter kitchen lighting eliminates shadows on work surfaces and improves task visibility while adding ambient lighting that makes kitchens feel larger and more inviting.
- LED strip lights, puck lights, and linear LED bars each suit different cabinet layouts—strips work for continuous runs, pucks for short sections, and linear bars for professional even illumination.
- Choose lighting color temperature between 3000-3500K to balance ambiance with visibility, and prioritize fixtures with CRI 85+ to ensure accurate food color display and reduce eye strain.
- Installation complexity ranges from simple plug-in systems requiring only an outlet to hardwired 120V options that may need permits and electrical expertise, making DIY feasible for most homeowners.
- Modern LED under counter fixtures consume just 3-10 watts per fixture compared to older 15-20 watt fluorescent strips, with energy savings typically offsetting installation costs over the fixture’s 25,000-50,000 hour lifespan.
- Proper mounting 2-3 inches from the cabinet front edge prevents glare and ensures light falls directly on countertops, while regular spacing of puck lights at 12-18 inches apart creates even illumination without scalloped patterns.
Why Under Counter Lighting Is Essential for Modern Kitchens
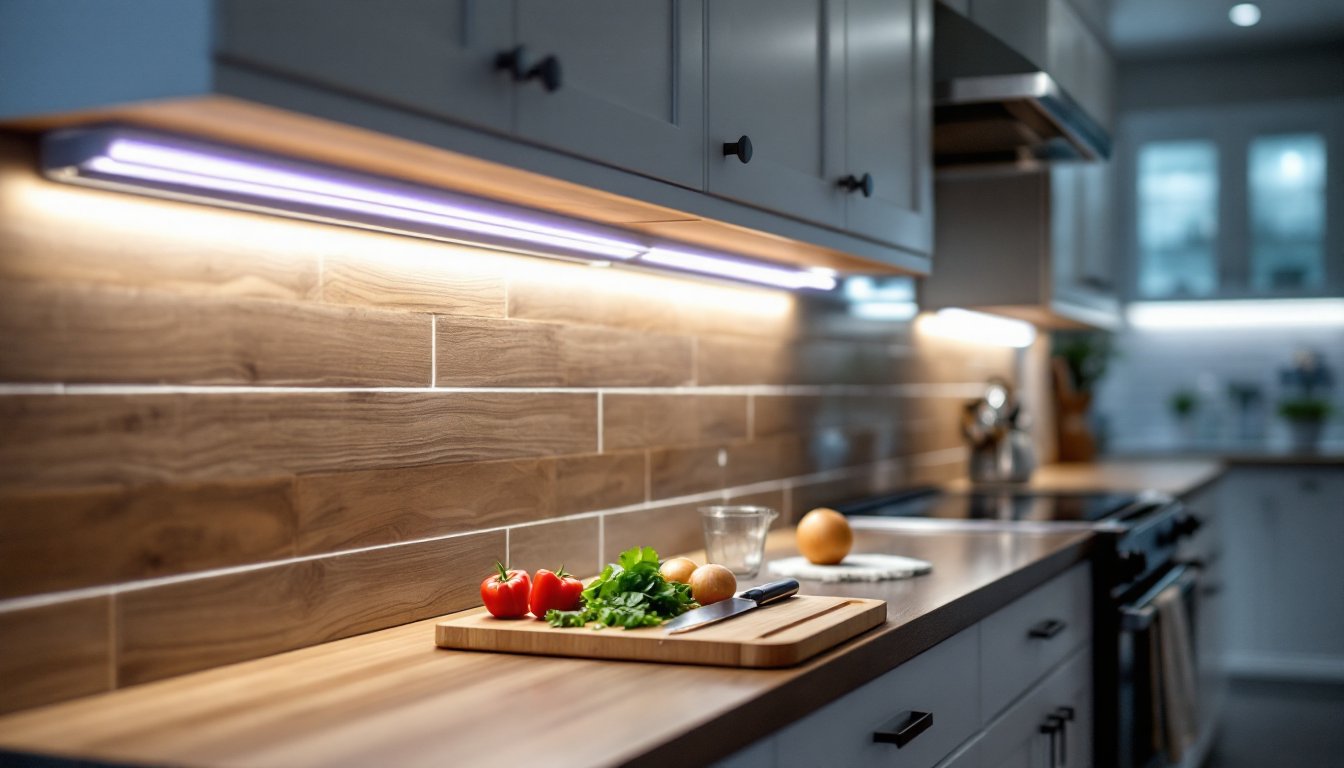
Overhead ceiling fixtures light a room but create shadows on countertops, right where prep work happens. Under counter lighting (also called under cabinet lighting) mounts beneath wall cabinets and directs light downward onto work surfaces. This placement eliminates shadows cast by the cook’s body and improves task visibility for chopping, measuring, and reading recipes.
Beyond function, these fixtures add ambient lighting that makes kitchens feel larger and more inviting during evening hours. Cabinets with glass doors benefit from interior illumination, showcasing dishware without needing separate display lighting.
Kitchens with dark countertops, granite, quartz, or butcher block, gain the most noticeable improvement. Light-colored surfaces reflect overhead lighting better, but even white marble benefits from direct task lighting to reduce eye strain during detailed work.
Modern LED options consume minimal electricity, typically 3-10 watts per fixture compared to older fluorescent strips that drew 15-20 watts. Over the fixture’s 25,000-50,000 hour lifespan, energy savings offset the initial installation cost, especially in kitchens where task lighting strategies run several hours daily.
Types of Under Counter Kitchen Lighting
LED Strip Lights
LED strip lights consist of flexible circuit boards embedded with small LED diodes, typically sold in 16-foot reels that can be cut to length at marked intervals (usually every 2-3 inches). They install with peel-and-stick adhesive backing and connect to a low-voltage transformer, making them the most flexible option for irregular cabinet layouts.
Most strips produce 200-400 lumens per foot, which provides adequate task lighting for standard 24-inch-deep counters. Color temperature ranges from warm white (2700K) to daylight (5000K), with some models offering tunable white or RGB color-changing features via remote control.
The adhesive backing works on clean, dry surfaces but may fail on textured cabinet bottoms. For permanent installation, add aluminum channels with diffuser lenses, these protect the strip, improve heat dissipation, and create a cleaner light output without visible LED dots. Channels add $8-15 per linear foot but significantly improve longevity and appearance.
Wiring multiple strips requires attention to total wattage. A standard 60-watt transformer handles about 15 feet of strip at 4 watts per foot. Exceeding transformer capacity causes dimming and premature LED failure.
Puck Lights
Puck lights are small, disc-shaped fixtures (typically 2.5-4 inches in diameter) that mount individually beneath cabinets. They work well in kitchens with limited cabinet runs or where focused task lighting matters more than even illumination.
Each puck produces 200-400 lumens in a concentrated beam pattern, creating bright spots directly below the fixture with darker areas between units. For even coverage, space pucks 12-18 inches apart on standard depth cabinets. Wider spacing creates a scalloped light pattern that some homeowners find distracting.
Hardwired pucks connect via low-voltage wiring daisy-chained from fixture to fixture back to a single transformer. Battery-powered versions eliminate wiring but require battery changes every 3-6 months depending on usage. Plug-in models work for short cabinet runs near outlets but create visible cords.
Surface-mount pucks install with screws through the cabinet bottom. Recessed versions require drilling 2-3 inch holes, which works only on cabinets with solid wood or plywood bottoms, not particleboard or MDF, which crumbles around large holes.
Linear LED Bars
Linear LED bars are rigid fixtures sold in fixed lengths (6, 12, 18, 24, and 36 inches), with integrated housings that include the LED array, driver, and diffuser in a single unit. They produce the most even, professional-looking light output of the three types, and examples of effective task lighting design often feature linear bars for consistent illumination.
These fixtures mount with clips or screws and link together with connector cables, creating a continuous run of light without gaps. Better models include diffuser lenses that eliminate LED hot spots and create smooth, uniform illumination from end to end.
Hardwired bars connect to standard 120V household current, eliminating the need for transformers. This simplifies installation but requires basic electrical knowledge and may need a permit depending on local code. Low-voltage versions (12V or 24V) use plug-in transformers similar to strip lights.
Light output ranges from 300-800 lumens per foot depending on fixture quality. Commercial-grade bars designed for workbench use produce higher output but may feel harsh in residential kitchens. For cooking tasks, 400-500 lumens per foot provides excellent visibility without glare.
Dimmable models require compatible dimmer switches, not all LED fixtures work with standard incandescent dimmers. Check manufacturer specs for dimmer compatibility to avoid flickering or buzzing.
How to Choose the Right Under Counter Lighting for Your Kitchen
Cabinet layout determines which fixture type works best. Continuous cabinet runs of 6 feet or more suit LED strips or linked linear bars that create even illumination without gaps. Kitchens with short cabinet sections separated by windows or open shelving work better with individual puck lights or shorter linear bars.
Measure cabinet depth and overhang. Standard wall cabinets are 12 inches deep, creating a small overhang above 24-inch counters. Fixtures should mount 2-3 inches from the cabinet’s front edge to keep light on the counter without spilling onto the floor or causing glare at eye level when standing.
Color temperature affects how food and surfaces appear. Warm white (2700-3000K) creates a cozy atmosphere and makes wood tones look rich but can make task work feel dim. Neutral white (3500-4000K) balances ambiance with visibility and shows food colors accurately. Daylight (5000K+) provides the brightest task lighting but feels clinical in residential kitchens. Many homeowners prefer 3000-3500K as a middle ground.
Dimming capability adds flexibility. Full-brightness task lighting works for meal prep, while dimmed fixtures provide ambient lighting during dinner or late-evening kitchen visits. Not all LED fixtures dim smoothly, cheap drivers flicker or shut off above certain dimmer settings. Look for fixtures specifically rated for dimming, and when exploring modern lighting approaches for whole-room design, dimmable under-cabinet fixtures integrate better with layered lighting plans.
Power supply impacts installation complexity. Plug-in fixtures work for renters or anyone avoiding electrical work but create visible cords. Hardwired 120V fixtures require connecting to household circuits, doable for DIYers comfortable with electrical, but may require permits. Low-voltage systems (12V/24V) with plug-in transformers split the difference: they need an outlet but don’t require opening junction boxes.
Budget roughly $3-8 per linear foot for basic LED strips, $15-30 per puck for mid-grade fixtures, and $25-60 per linear foot for quality linear bars with diffusers and dimming. Installation adds $100-300 for professional work on a typical kitchen, more if running new circuits.
Color Rendering Index (CRI) measures how accurately light shows colors compared to natural sunlight. Look for CRI of 85 or higher for kitchens, lower values make food look washed out and make it harder to judge doneness while cooking. Premium fixtures list CRI specs: if it’s not mentioned, assume it’s below 80.
Step-by-Step Installation Guide for DIY Homeowners
Safety first: Shut off power at the breaker for any hardwired installation. Use a non-contact voltage tester to confirm circuits are dead before touching wires. Wear safety glasses when drilling overhead, and use a dust mask if working with older cabinets that might contain asbestos-backed materials (rare, but present in some pre-1980 homes).
Tools and Materials:
- LED strip lights, puck lights, or linear bars (measured to fit cabinet runs)
- Power supply/transformer (if low-voltage)
- Wire connectors and 18-2 low-voltage wire (for hardwired systems)
- Drill with bits (for mounting screws)
- Cable clips or aluminum mounting channels
- Wire stripper
- Level
- Measuring tape
- Pencil
- Rubbing alcohol and clean cloth (for adhesive prep)
Step 1: Plan the Layout
Measure each cabinet section where lighting will install. For strip lights, note where cuts will occur (only at marked intervals). For puck lights, mark center points 12-18 inches apart. Linear bars should run the full length of each cabinet section with 1-2 inch gaps at ends.
Identify the power source. Plug-in systems need an accessible outlet, ideally inside a cabinet or behind the refrigerator to hide the transformer. Hardwired systems connect to an existing switch or new switch installed in a convenient location.
Step 2: Prep the Surface
Clean cabinet bottoms with rubbing alcohol to remove grease and dust. Adhesive-backed strips fail on dirty surfaces. Let dry completely, 5 minutes minimum.
For cabinets with visible screw holes or rough texture, consider mounting channels. These create a clean surface and improve light quality, though they add time and cost to the project. Many curated fixture selections showcase channel-mounted installations for reference.
Step 3: Mount the Fixtures
For LED strips: Peel backing and press firmly along the planned route, 2-3 inches from the cabinet front edge. Work slowly to keep the strip straight, once adhesive contacts the surface, repositioning damages the backing. Cut strips only at marked cut points, never between them, or the circuit breaks.
For puck lights: Mark screw holes using the fixture as a template. Pre-drill pilot holes to prevent splitting cabinet bottoms. Mount with included screws, keeping fixtures level.
For linear bars: Use included mounting clips or screws. Some models clip into pre-installed tracks, others screw directly to cabinet bottoms. Link multiple bars with connector cables, ensuring polarity matches (+ to +, – to -).
Step 4: Wire the System
For plug-in systems: Route the transformer cord to the nearest outlet, securing it along the cabinet back or side with cable clips. Keep cords away from heat sources (dishwasher vents, range hoods).
For low-voltage hardwired: Run 18-2 wire from the transformer to the first fixture, then daisy-chain to additional fixtures. Strip 1/4 inch of insulation from wire ends. Connect using push-in connectors or wire nuts, ensuring no bare copper shows. Mount the transformer inside a cabinet or behind a toe kick, secured with screws.
For 120V hardwired: This requires connecting to household circuits. If comfortable with electrical work, connect fixture wires to the circuit using wire nuts (black to black, white to white, ground to ground). If not, hire a licensed electrician. Many jurisdictions require permits for new 120V lighting circuits, check local code before starting.
Step 5: Test and Adjust
Restore power and test all fixtures. LEDs should light immediately without flickering. If sections don’t light, check connections and polarity.
Dim the lights and observe for flicker or buzzing. Some LED-dimmer combinations create noise, if present, try a different dimmer model rated for LED loads.
Stand at the counter in a normal working position. Light should fall on the work surface without glare in the eyes. If glare occurs, reposition fixtures slightly farther back or add a diffuser lens.
Common Issues:
- Strip sections dark: Cut likely made at the wrong point, breaking the circuit. Cut a new piece at a marked interval.
- Flickering: Loose connection or incompatible dimmer. Check all wire connections: replace dimmer with LED-rated model.
- Dim output: Transformer undersized for total wattage. Calculate total fixture wattage and upgrade transformer if needed.
- Adhesive failure: Surface not clean or textured. Remove strip, clean surface again, or switch to screw-mount channels.
Always follow the manufacturer’s installation manual for fixture-specific requirements. Some premium systems include specific mounting hardware or require particular wire gauges that differ from standard practice. Understanding general lighting principles helps troubleshoot issues that arise during any lighting project, including under-cabinet installations.


