
A poorly lit kitchen is a frustrating kitchen. Chopping vegetables in your own shadow, struggling to read recipe cards, or walking into a dim room at 6 a.m. isn’t just annoying, it’s a design flaw. Kitchen lighting should support how the space gets used: prepping, cooking, cleaning, and gathering. Most kitchens rely on a single overhead fixture, which creates harsh shadows and leaves workspaces underlit. Proper lighting requires layering three types of light, ambient, task, and accent, to create a balanced, functional space that feels as good as it looks.
Table of Contents
ToggleKey Takeaways
- Effective kitchen lighting requires layering three types of light—ambient, task, and accent—rather than relying on a single overhead fixture, which creates harsh shadows and underlit workspaces.
- An average kitchen (150–200 square feet) needs 3,000–4,000 lumens of ambient light, with recessed lights spaced 4–6 feet apart and dimmable fixtures for flexibility throughout the day.
- Under-cabinet LED strips and task lighting over sinks and islands eliminate shadows on countertops and are essential for safe, detailed kitchen work.
- Plan kitchen lighting on paper first by mapping work zones, calculating total lumens needed (50–75 per square foot), and installing separate switches for ambient, task, and accent lighting to maximize control.
- Use LED bulbs in the 3000K–4000K range with a CRI of 90 or higher to ensure consistent color temperature and avoid the disjointed look of mixed lighting temperatures.
- Most new kitchen lighting installations require electrical permits and may need a licensed electrician, while retrofit projects like adding plug-in under-cabinet lights are DIY-friendly and rarely require permits.
Understanding the Three Types of Kitchen Lighting
Effective kitchen lighting isn’t about a single bright bulb. It’s about layering three distinct types of light, each serving a specific purpose. Understanding how ambient, task, and accent lighting work together lets homeowners design a space that’s both functional and visually balanced.
Ambient Lighting: Your Kitchen’s Foundation
Ambient lighting is the general illumination that fills the room. It’s the base layer that allows someone to walk in and navigate safely without turning on every switch. In kitchens, ambient light typically comes from ceiling-mounted fixtures: flush-mount or semi-flush fixtures, recessed cans, or track lighting.
For an average-sized kitchen (roughly 150–200 square feet), plan for 3,000–4,000 lumens of ambient light. Recessed lights (often called can lights) should be spaced about 4–6 feet apart, depending on ceiling height. For an 8-foot ceiling, a 4-foot spacing works: taller ceilings need closer spacing or higher-lumen bulbs.
Many designers recommend lighting principles that balance layered sources. LED bulbs in the 3000K–4000K range (warm to neutral white) offer good color rendering without the yellow cast of older incandescents or the clinical feel of daylight bulbs. Dimmable fixtures add flexibility, bright for meal prep, softer for evening cleanup.
Task Lighting: Illuminate Your Workspaces
Task lighting targets specific work zones: counters, the sink, the stovetop, and the island. This is where most kitchen activities happen, and shadows from overhead fixtures can make detailed work difficult.
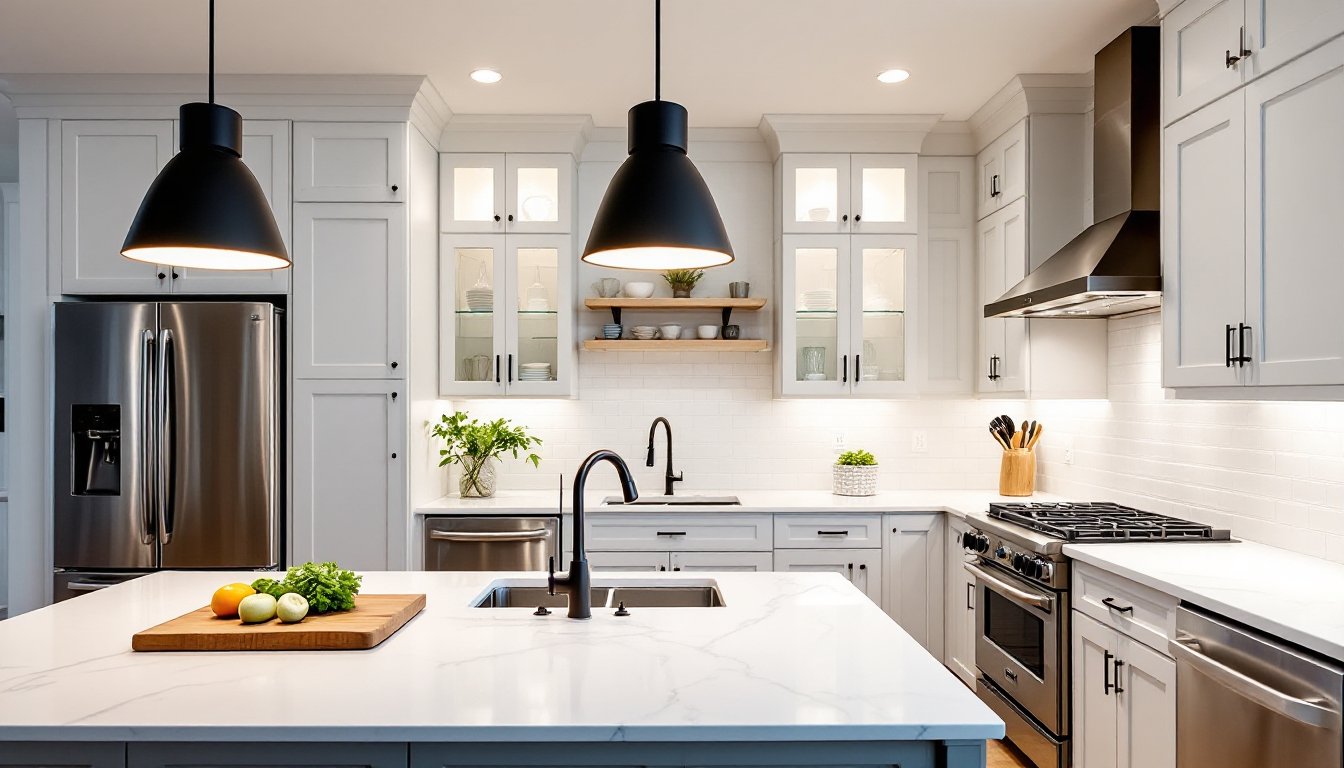
Under-cabinet lighting is the workhorse of kitchen task lighting. LED strip lights or puck lights mounted under wall cabinets eliminate shadows on countertops. Strips provide even, continuous light: pucks create pools of light with some gaps between fixtures. Install them toward the front edge of the cabinet to reduce glare on polished countertops. Hardwired installations look cleaner, but plug-in options work for renters or quick upgrades.
Over the sink, a recessed can or a small pendant fixture provides focused light. For islands, pendant lights are both functional and decorative. Hang them 30–36 inches above the counter surface to avoid head-bumping while keeping light focused on the workspace. Use multiple pendants over long islands, spacing them 24–30 inches apart creates even coverage.
If the range has a built-in hood with integrated lighting, that’s often sufficient for stovetop tasks. If not, a recessed can directly above (or slightly in front of) the range works. Just ensure it’s rated for the heat if it’s close to a high-BTU cooktop.
Accent Lighting: Add Drama and Depth
Accent lighting isn’t essential for function, but it adds visual interest and highlights architectural features or design elements. In kitchens, accent lights can illuminate glass-front cabinets, open shelving, or decorative backsplashes.
In-cabinet lighting, small LED pucks or strips inside glass-door cabinets, creates a soft glow and showcases dishware or glassware. Toe-kick lighting (LED strips mounted under base cabinets near the floor) adds a modern, floating effect and provides gentle nighttime navigation light.
Above-cabinet lighting works well in kitchens with a gap between the cabinet tops and the ceiling. Running LED strip lights along the top casts an indirect wash up the wall, making ceilings feel taller.
Accent fixtures should be on separate switches or dimmers. They’re not meant to compete with task or ambient light, they layer in subtlety.
Best Fixtures for Modern Kitchen Lighting
Choosing fixtures means balancing aesthetics, output, and installation complexity. The right fixture depends on ceiling height, kitchen size, and whether the space skews traditional or contemporary.
Recessed lighting remains the most common ambient source. Six-inch cans are standard: smaller 4-inch versions work for tighter layouts or accent applications. Look for IC-rated housings if the fixture will contact insulation in the ceiling cavity. Many municipalities require airtight (AT-rated) recessed cans to meet energy codes. Retrofit LED trim kits make it easy to upgrade old incandescent cans without rewiring.
Pendant lights have exploded in variety. Single large pendants suit smaller islands: linear pendants or a series of smaller globes work for longer spans. Glass pendants offer a classic look but show dust and grease quickly in a kitchen environment. Metal or ceramic finishes are easier to maintain. Many homeowners follow current fixture styles that emphasize mixed metals and geometric shapes.
Track lighting offers flexibility, individual heads can be aimed at work zones or accent features. Modern track systems have sleek profiles and use LED heads for energy efficiency. They’re easier to install than recessed cans (no cutting ceiling holes) and work well in kitchens with limited ceiling access.
Flush-mount and semi-flush fixtures suit kitchens with lower ceilings (under 8 feet). Semi-flush styles drop a few inches, creating a bit more visual presence without the clearance demands of a chandelier. Choose fixtures with a diffuser (frosted glass or acrylic) to avoid harsh glare from exposed bulbs.
Under-cabinet LED strips come in plug-in, battery, or hardwired versions. Hardwired strips connect to a wall switch and look cleanest, no visible cords. Plug-in versions are DIY-friendly but require an outlet inside or near the cabinet run. Battery-powered pucks are quick fixes but need frequent recharging or battery swaps.
For task and accent lighting, color temperature consistency matters. Mixing 2700K warm bulbs with 5000K daylight LEDs creates a disjointed look. Stick to a narrow range, 3000K to 3500K is a safe middle ground that flatters food and finishes without feeling cold. According to resources like The Kitchn, cohesive lighting temperature is one of the top mistakes DIYers overlook.
Smart bulbs and dimmer switches add control and convenience. Dimming capability is especially useful in kitchens that double as gathering spaces, bright for cooking, softer for dining or entertaining. Ensure dimmer switches are LED-compatible: older dimmers designed for incandescent bulbs can cause LED flickering or buzzing.
Planning Your Kitchen Lighting Layout
A good lighting plan starts with a measured drawing. Sketch the kitchen layout, marking cabinets, appliances, islands, and existing electrical boxes. Identify work zones, then layer in ambient, task, and accent sources.
Step 1: Establish ambient coverage. Calculate total lumens needed based on square footage. A general guideline is 50–75 lumens per square foot for kitchens (higher end for spaces with dark finishes or limited natural light). Divide that total across ceiling fixtures. For example, a 200-square-foot kitchen needs 10,000–15,000 lumens. Six recessed LED cans at 1,200 lumens each deliver 7,200 lumens: adding a central pendant or track lights bridges the gap.
Step 2: Map task zones. Mark countertops, the sink, range, and island. Under-cabinet lighting should run the full length of counter workspace, partial runs create uneven lighting and shadows. Over the island, pendants should align with the center or be evenly spaced if using multiples. For detailed guidance on balancing layers, basic lighting strategies offer a solid framework.
Step 3: Add accent and decorative elements. Glass cabinets, open shelves, or architectural details benefit from dedicated lighting. These fixtures are lower priority, install them after ambient and task lighting is finalized.
Step 4: Plan switching and controls. Separate switches (or smart controls) for ambient, task, and accent lighting provide flexibility. A three-way switch at both kitchen entrances is standard for ambient fixtures. Under-cabinet task lights can share a switch near the counter or integrate with motion sensors. Dimmer switches give control over mood and energy use.
Electrical and permitting considerations: Adding new circuits or relocating ceiling fixtures typically requires a permit. Most jurisdictions follow the National Electrical Code (NEC), which mandates GFCI protection for countertop receptacles within 6 feet of a sink. If the lighting plan involves running new wire through walls or ceilings, hire a licensed electrician unless the DIYer has electrical experience and local codes allow homeowner work.
Retrofit projects, swapping existing fixtures or adding plug-in under-cabinet lights, rarely need permits. Installing recessed cans in an existing ceiling requires cutting holes, running wire, and potentially dealing with insulation and fire-rated assemblies. It’s doable for experienced DIYers but not a beginner-friendly project. According to This Old House, planning electrical rough-in during a larger remodel saves labor and provides more layout flexibility.
Tool and material checklist:
- Measuring tape and laser level (for fixture placement)
- Drill/driver with hole saw (for recessed can installation)
- Wire strippers, voltage tester, electrical tape
- Drywall saw (if cutting ceiling access)
- Ladder or scaffolding (for ceiling work)
- PPE: safety glasses, work gloves, dust mask (drywall cutting creates fine dust)
If installing hardwired under-cabinet lights, a jigsaw or oscillating multi-tool may be needed to notch cabinet backs for wire passage. For plug-in systems, a cable management kit hides cords along cabinet interiors.
Common mistakes to avoid:
- Over-reliance on recessed lighting. Too many cans create a “ceiling full of holes” look and can feel commercial. Balance recessed fixtures with pendants or surface-mount styles.
- Ignoring light color and CRI. Cheap LED bulbs with low Color Rendering Index (CRI) make food and finishes look dull. Choose bulbs with a CRI of 90 or higher for kitchens.
- Undersizing or oversizing pendant height. Too low and they obstruct sightlines: too high and they don’t provide useful task light. The 30–36 inch guideline works for most standard-height islands (36 inches).
- Skipping dimmers. Fixed-brightness lighting limits versatility. Adding a dimmer during installation costs little but provides long-term value.
For kitchens with unusual layouts, galley kitchens, L-shapes with limited ceiling access, or spaces with sloped ceilings, consult professional lighting tips or work with a lighting designer. Many lighting showrooms offer free layout consultations if purchasing fixtures through them.
Conclusion
Good kitchen lighting layers ambient, task, and accent sources to create a balanced, hardworking space. Recessed cans and pendants handle general and focal light: under-cabinet strips eliminate counter shadows: accent fixtures add personality. Plan layouts on paper first, calculate lumens, and don’t skip dimmers or quality LEDs. Electrical work beyond simple fixture swaps usually requires permits and may warrant a licensed pro. Done right, a lighting upgrade transforms how a kitchen looks and functions, without tearing out a single cabinet.


