
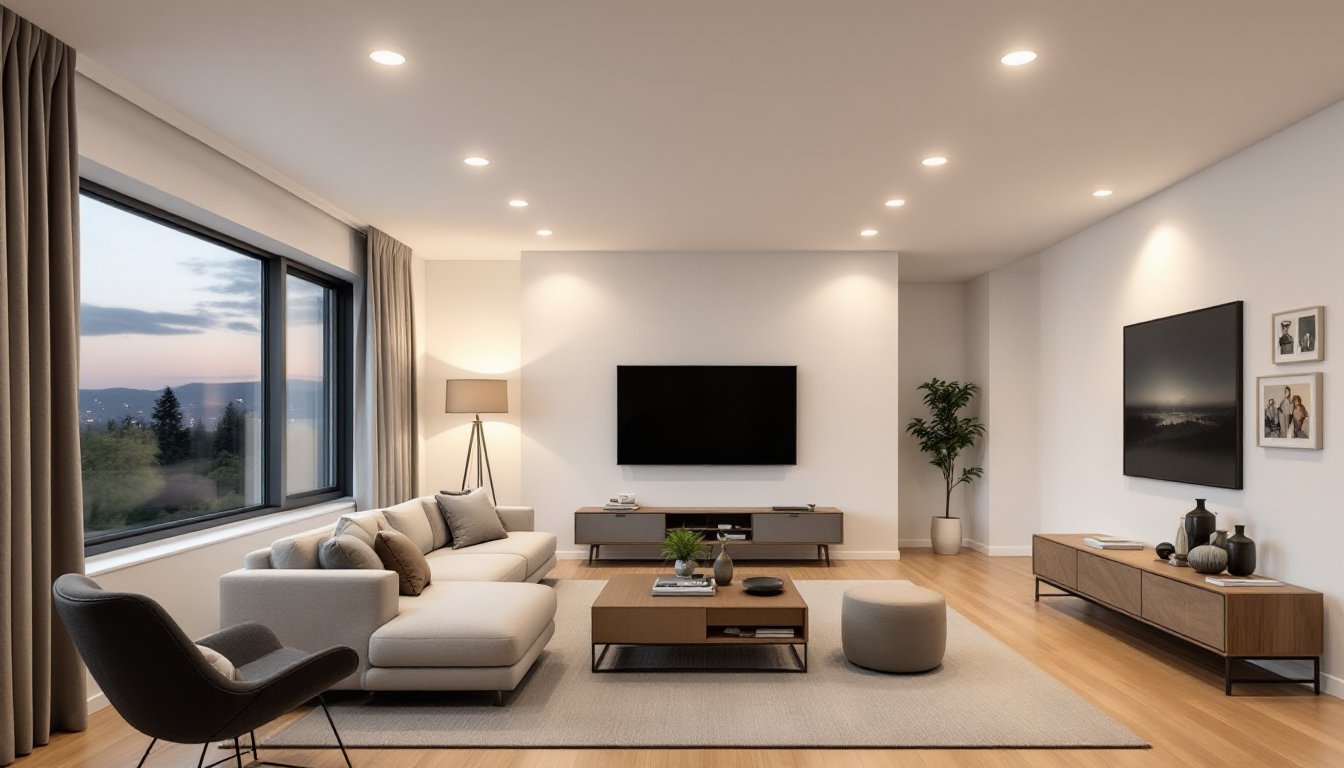
Recessed lighting, often called can lights or downlights, transforms a living room from flat and ordinary to layered and inviting. Unlike pendant fixtures or table lamps that take up visual space, recessed lights disappear into the ceiling while delivering clean, even illumination exactly where it’s needed. They’re ideal for living rooms with low ceilings, modern aesthetics, or homeowners who want flexibility in furniture arrangement without worrying about awkward lighting shadows. This guide walks through layout planning, fixture selection, installation considerations, and smart controls to help DIYers and homeowners create professional-grade ambient lighting.
Table of Contents
ToggleKey Takeaways
- Living room recessed lighting creates clean, layered illumination without cluttering sight lines, making spaces feel taller and more open while allowing flexible furniture rearrangement.
- Plan layouts using the 20 lumens per square foot rule and half-spacing principle—space fixtures based on ceiling height to avoid dark zones or overly bright commercial effects.
- Choose IC-rated, airtight 6-inch LED fixtures with dimmable capability and 2700K–3000K color temperature for optimal energy efficiency and ambiance in living spaces.
- Always verify permit requirements, shut off power at the breaker, and hire a licensed electrician for new circuits, complex installations, or multi-story projects to ensure code compliance and safety.
- Pair recessed lights with LED-compatible dimmers or smart controls to create adaptable moods—from bright task lighting to soft ambient glow—while reducing energy consumption.
Why Recessed Lighting Works Perfectly for Living Rooms
Recessed lights solve common living room lighting problems that surface-mounted fixtures can’t. They provide overhead illumination without cluttering sight lines, making rooms feel taller and more open, especially valuable in homes with 8-foot ceilings where hanging fixtures might feel oppressive.
Unlike chandeliers or track lighting, recessed cans don’t dictate furniture placement. Rearrange the sofa, swap the media console, or add a reading chair without creating dark corners or awkward shadows. This flexibility matters in multipurpose living spaces that serve as family rooms, entertainment hubs, and home offices.
Modern LED recessed fixtures also deliver energy efficiency surface lights can’t match. A typical 4-inch or 6-inch LED retrofit can produces 650–1000 lumens while drawing just 9–15 watts, roughly 80% less energy than old incandescent cans. With proper dimming controls, recessed lighting adapts from bright task lighting during cleanup to soft ambient glow for movie nights.
Recessed fixtures integrate seamlessly with smart home systems, too. Pair them with motion sensors, voice assistants, or app-based scenes to automate lighting based on time of day or activity. For homeowners prioritizing clean, contemporary design and lighting flexibility, recessed cans deliver unmatched versatility.
Planning Your Living Room Recessed Lighting Layout
Getting layout right prevents the two most common mistakes: too few lights creating dark zones, or too many creating a harsh, commercial feel. Start by measuring the room and identifying functional zones, seating areas, TV walls, entryways, and accent features like artwork or bookshelves.
A general rule: provide 20 lumens per square foot for ambient living room lighting. A 200-square-foot living room needs roughly 4,000 lumens total. If using 800-lumen fixtures, that’s five cans. Adjust up for rooms with dark wall colors or down for spaces with abundant natural light.
Keep recessed lights away from walls. Placing cans closer than 18–24 inches from the perimeter creates harsh shadows and uneven light distribution. For accent lighting on artwork or built-ins, use adjustable gimbal trim or eyeball fixtures positioned 24–30 inches out from the wall, angled at roughly 30 degrees.
Avoid placing recessed lights directly above seating areas unless using deep baffle trims or diffusers. Nobody enjoys glare while watching TV or reading. Instead, position cans to wash light across the space from multiple angles, creating balanced illumination without hot spots.
Consider ceiling obstructions before finalizing placement. Ceiling joists, HVAC ducts, and wiring can block housing installation. In new construction, coordinate with framers. In remodel projects, use a stud finder and consult attic access to map obstructions. Essential room lighting techniques emphasize careful planning before cutting any holes.
Spacing and Placement Guidelines
For general ambient lighting, follow the half-spacing rule: divide ceiling height by two to determine spacing between fixtures. In a room with 8-foot ceilings, place cans roughly 4 feet apart. Ten-foot ceilings allow 5-foot spacing.
Arrange lights in a grid pattern for uniform coverage, or use a more organic layout to emphasize zones. In rectangular living rooms, two or three rows running parallel to the longest wall typically work best. Square rooms often benefit from a symmetrical grid.
For task-specific areas, reading nooks, game tables, or crafting zones, tighten spacing to 3 feet and consider slightly higher lumen output. Adjustable trims let homeowners direct light exactly where needed without adding extra fixtures.
Always sketch the layout on graph paper or use a room lighting planner before purchasing materials. Mark ceiling joists, existing wiring, and any structural elements that might interfere. Take measurements twice. Cutting holes in the wrong spots wastes material and creates unnecessary patching work.
Choosing the Right Recessed Lights for Your Space
Recessed lighting comes in two main categories: new construction housings (installed before drywall) and remodel housings (designed for retrofit into existing ceilings). DIYers working in finished living rooms need remodel cans, which use spring clips or toggle brackets to secure the fixture without attic access.
Fixture size matters. 4-inch cans work well for accent lighting, hallways, or rooms with limited ceiling depth. 6-inch cans are the living room standard, providing broader light spread and higher lumen output. Larger sizes exist, but they’re typically overkill for residential spaces and require more clearance above the ceiling.
Pay attention to housing type. IC-rated (insulation contact) housings allow direct contact with ceiling insulation, critical for energy efficiency and code compliance in most jurisdictions. Non-IC housings require 3 inches of clearance from insulation, which wastes conditioned air. If the living room sits below an attic, specify IC-rated fixtures.
Airtight housings minimize air leakage between conditioned spaces and unconditioned attics, improving HVAC efficiency. Look for fixtures with gaskets and sealed connections. Many jurisdictions now require airtight cans in new construction and major remodels, check local building codes before purchasing.
For light quality, choose LED retrofit kits or integrated LED fixtures over old-school incandescent cans. LEDs last 25,000–50,000 hours, generate minimal heat, and provide better color rendering. Look for a color temperature between 2700K (warm white, similar to incandescent) and 3000K (soft white) for living rooms. Avoid cool white (4000K+) unless the space doubles as a home office.
Trim style affects both aesthetics and light distribution. Baffle trims reduce glare with ribbed interiors, ideal above seating areas. Reflector trims maximize light output with smooth, white or metallic finishes. Adjustable trims (gimbal or eyeball) allow directional lighting for artwork or architectural features. For a cohesive look, match trim finish to other ceiling fixtures and hardware.
Some retrofit LED kits eliminate the need for separate housings entirely. These wafer lights install directly into drywall cutouts with integral junction boxes, simplifying installation and reducing ceiling depth requirements to as little as ½ inch. They’re ideal for shallow ceiling cavities or homeowners tackling DIY installs without attic access. Reviews on recessed lighting options highlight top-performing models for various applications.
Installing Recessed Lighting: DIY vs. Professional Help
Installing recessed lighting involves cutting ceiling holes, running electrical wire, and connecting fixtures to the home’s power supply, work governed by the National Electrical Code (NEC) and local building codes. Most jurisdictions require permits for new circuits or modifications to existing wiring, and some mandate licensed electrician involvement.
DIY-friendly scenarios include replacing existing recessed fixtures with LED retrofit kits (no rewiring needed), or adding lights to an existing circuit with available capacity. If comfortable working with basic electrical connections, shutting off breakers, using wire nuts, and securing ground wires, a homeowner can often handle retrofit installations. Always verify the circuit can handle additional load: a typical 15-amp living room circuit supports roughly 1,440 watts, but leave 20% capacity as a safety buffer.
When to call a professional: running new circuits from the breaker panel, working in ceilings without attic access, dealing with aluminum wiring, or tackling installations in multi-story homes where fishing wire through walls becomes complex. If the project involves moving or adding circuits, hire a licensed electrician. Permit inspectors will verify proper wiring, junction box support, and IC-rating compliance, mistakes here create fire hazards.
Budget $150–$300 per fixture for professional installation, including labor, materials, and permits. Costs vary widely by region and ceiling accessibility. Projects requiring extensive remodeling planning often benefit from contractor bids to compare pricing.
Safety warnings: Always shut off power at the breaker panel before cutting into ceilings or handling wiring. Use a non-contact voltage tester to confirm circuits are dead. Wear safety glasses when cutting drywall, and use respiratory protection if working around old insulation. Never work alone on ladder-based tasks, a second pair of hands prevents falls and holds fixtures during installation.
For DIY installations, rent or purchase a hole saw kit sized to the fixture housing (typically 4⅛-inch or 6¼-inch). A drywall saw or reciprocating saw also works but requires more cleanup. After cutting, secure remodel housings using built-in clips, then make electrical connections following manufacturer wiring diagrams. Connect black (hot) to black, white (neutral) to white, and bare copper or green (ground) to ground. Tuck wires neatly into the housing before securing the fixture.
Test all lights before installing trim rings. Swap out any flickering or non-functional units while ceiling access is easy. Once trim snaps into place, adjust beam angles on directional fixtures and confirm even light distribution across the room.
Creating the Perfect Ambiance with Dimming and Smart Controls
Recessed lighting reaches full potential when paired with dimmer switches and smart controls. Dimming extends LED lifespan, reduces energy consumption, and transforms a single lighting layout into multiple moods, bright for cleaning, medium for conversation, low for movie nights.
Not all LEDs dim smoothly. Look for fixtures explicitly labeled dimmable and pair them with LED-compatible dimmers. Older TRIAC dimmers designed for incandescent bulbs often cause flickering, buzzing, or limited dimming range with LEDs. Modern ELV (electronic low-voltage) dimmers or manufacturer-recommended models deliver smooth, flicker-free performance down to 10% brightness.
Install dimmers rated for the total wattage of all fixtures on the circuit. Six 12-watt LED cans draw 72 watts total, well within a standard 150-watt dimmer’s capacity. But always check spec sheets. Undersized dimmers overheat and fail prematurely.
Smart dimmers and switches integrate recessed lighting with voice assistants (Alexa, Google Assistant) and automation platforms (Apple HomeKit, SmartThings). Set schedules to turn lights on at sunset, create scenes that combine multiple fixture groups, or adjust brightness from a smartphone without leaving the couch. Popular brands like Lutron Caséta, Leviton Decora, and TP-Link Kasa offer reliable options starting around $40–$80 per switch.
For advanced control, consider tunable white LEDs that shift color temperature throughout the day, cool white in the morning for alertness, warm white in the evening for relaxation. These fixtures require compatible smart controllers but provide lighting quality that adapts to circadian rhythms.
Some homeowners integrate recessed lights with motion sensors or occupancy sensors for hands-free operation. Wall-mounted sensors work well in high-traffic entryways: ceiling-mounted sensors cover larger zones but may trigger unexpectedly if positioned over active seating areas. Combining smart lighting controls with recessed fixtures creates a flexible, energy-efficient system.
Group fixtures into zones controlled by separate switches or smart modules. In open-concept living spaces, separate controls for seating, entertainment, and dining zones prevent over-lighting unused areas. A simple three-way switch setup allows control from multiple room entrances, critical in larger living rooms.
Test dimming performance after installation. Run each zone through its full range, watching for flicker, buzz, or sudden drop-offs. Most issues trace to mismatched dimmer types or non-dimmable bulbs. Swap components as needed before calling the job complete. Well-designed recessed lighting with thoughtful controls delivers years of reliable, adaptable illumination.
Conclusion
Recessed lighting delivers clean, flexible ambient illumination that adapts to any living room style or activity. Careful layout planning, proper fixture selection, and smart controls turn a basic install into a professional-quality lighting system. Whether tackling a DIY retrofit or hiring an electrician for new construction, the result is a living space that feels larger, more comfortable, and ready for anything.


