
Farmhouse kitchens blend warmth, practicality, and timeless design, and the right lighting pulls it all together. Flush mount fixtures offer a clean, unobtrusive solution for lower ceilings while delivering the rustic charm that defines the farmhouse aesthetic. Whether you’re renovating a century-old kitchen or adding character to a new build, choosing the right flush mount can transform overhead lighting from an afterthought into a focal point. This guide walks through styles, sizing, installation, and how to layer farmhouse flush mounts with other lighting to create a kitchen that’s both functional and inviting.
Table of Contents
ToggleKey Takeaways
- Farmhouse flush mount kitchen lighting provides ambient light without vertical obstruction, making it ideal for standard 8-foot ceilings and spaces where pendant fixtures would hang too low.
- Top farmhouse styles include cage and wire fixtures in oil-rubbed bronze or matte black, milk glass drums for cottage elegance, wood-accented finishes for warmth, and seeded glass for subtle texture and practicality.
- For proper sizing, add your kitchen’s length and width in feet and convert to inches—a 12 by 14-foot kitchen calls for a 26-inch fixture—though most farmhouse flush mounts range from 12 to 18 inches in diameter.
- Layer flush mount fixtures with under-cabinet LED strips (3000K color temperature), task pendants over islands, and recessed cans near work zones to create functional, multi-layered kitchen lighting.
- Choose finishes that match existing hardware: oil-rubbed bronze and aged brass bring warmth, matte black is bold and forgiving, and galvanized steel references agricultural roots—avoid mixing more than two to three metal finishes in one room.
- Upgrade to a metal ceiling box rated for 50 pounds and secured to joists, use dimmable LED bulbs (800-1,100 lumens), and verify wire connections are snug to prevent flickering and ensure safe, long-term performance.
Why Flush Mount Lighting Works Perfectly in Farmhouse Kitchens
Flush mounts sit tight against the ceiling, typically extending no more than 6 to 8 inches below the surface. That makes them ideal for kitchens with standard 8-foot ceilings or rooms where pendants would hang too low over work zones. They provide ambient lighting without eating up vertical space, crucial in galley kitchens or rooms with bulky range hoods.
Farmhouse design values simplicity and utility, and flush mounts deliver both. Traditional farmhouse kitchens often featured single overhead fixtures, bare bulbs, porcelain drums, or metal shades, rather than elaborate chandeliers. Modern flush mounts echo that heritage with clean lines, matte finishes, and materials like wrought iron, aged brass, and milk glass.
Unlike recessed cans, flush mounts add visual texture. A bronze cage fixture or seeded glass drum brings architectural interest to a plain ceiling without competing with open shelving, subway tile, or shiplap. They’re also easier to install than recessed lighting, which requires cutting into drywall and possibly rerouting wiring, especially valuable in retrofit projects where you’re working around existing joist layouts.
In open-concept homes, flush mounts help define the kitchen zone. Matching finishes across the kitchen and adjacent dining or living areas creates cohesion, while varying the fixture style, say, a wire cage flush mount in the kitchen and a simple drum in the hallway, adds subtle differentiation without breaking the aesthetic.
Top Farmhouse Flush Mount Styles for Your Kitchen
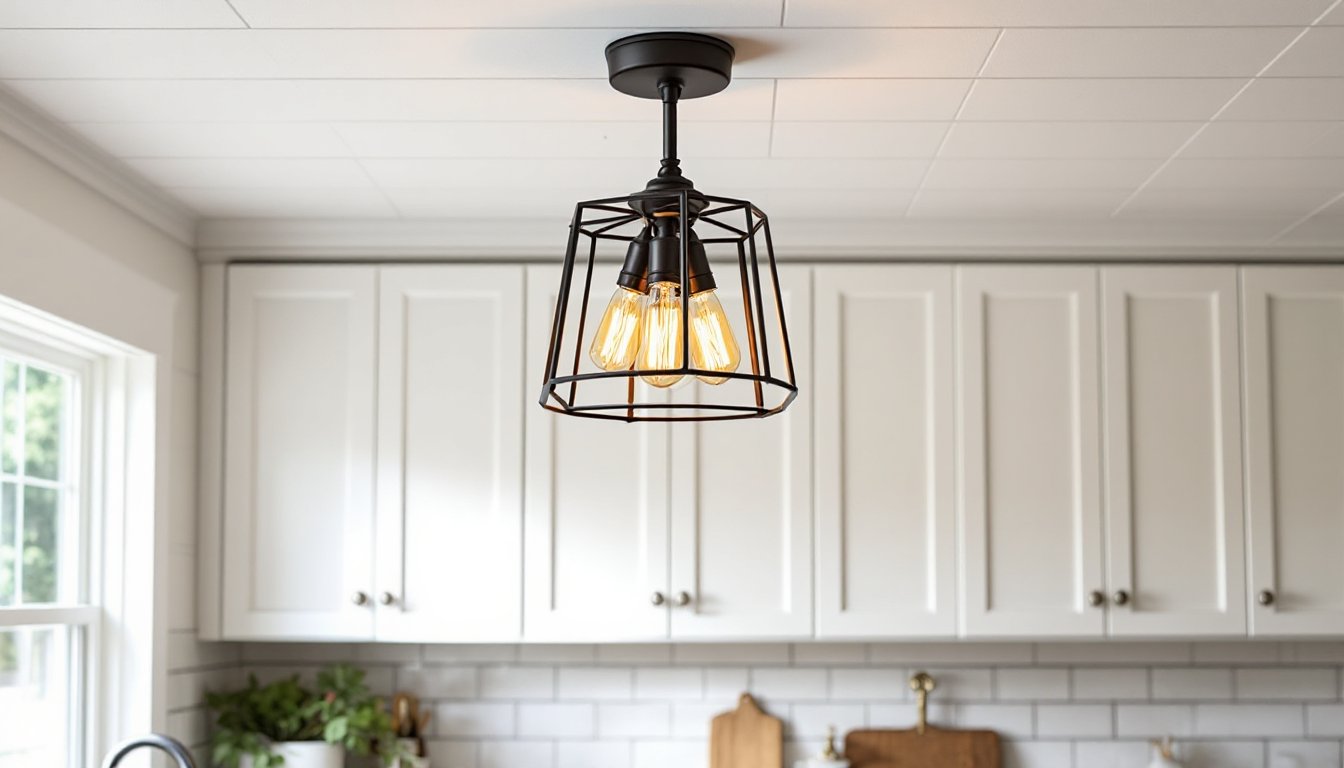
Cage and wire fixtures are farmhouse workhorses. These use open metal frames, often in oil-rubbed bronze, matte black, or galvanized steel, around clear or frosted bulbs. They nod to industrial barn lighting and pair well with butcher block counters and apron-front sinks. Look for models with Edison-style LED bulbs (typically 60-watt equivalent) to complete the vintage look without the heat or energy waste of incandescent bulbs.
Milk glass and opal shades soften the light and add a gentler, cottage-style vibe. These work especially well in kitchens with white or cream cabinetry, where a metal cage might feel too industrial. A 10 to 12-inch diameter milk glass drum provides enough coverage for a small to mid-sized kitchen without overwhelming the space.
Wood-accented fixtures bring warmth and texture. Beaded wood or faux wood trim around a metal frame adds a handcrafted touch. These fixtures suit kitchens with exposed beams or butcher block islands. Just verify the wood finish is rated for damp locations if you’re installing near a sink or range where steam and grease are present.
Seeded or rippled glass adds subtle character without busy patterns. The texture diffuses light gently and hides dust better than clear glass, a practical bonus in kitchens where flour and grease inevitably settle. Pair seeded glass with antique brass or brushed nickel hardware for a refined farmhouse look that doesn’t skew too rustic.
Semi-Flush vs. Flush Mount: Which Is Right for Your Space?
Semi-flush mounts drop 8 to 12 inches from the ceiling, creating a small gap that allows light to wash upward and outward. This produces more ambient light and reduces harsh shadows compared to true flush mounts. If your ceiling height is 9 feet or more, a semi-flush can add visual interest without crowding the room. They’re especially effective in farmhouse kitchen renovations where historical charm and layered lighting are priorities.
True flush mounts sit nearly flat against the ceiling, extending only 4 to 6 inches down. They’re the better choice for 8-foot ceilings or kitchens with large range hoods, pot racks, or upper cabinets where vertical clearance is tight. Flush mounts also work well in narrow galley kitchens, where a semi-flush fixture could make the space feel cramped.
Consider the bulb configuration. Semi-flush fixtures often use multiple bulbs or upward-facing sockets, which increases total lumens and creates softer, more even light. Flush mounts typically house one to three bulbs aimed downward, producing a more focused pool of light. For task-heavy zones, pair a flush mount with under-cabinet lighting to fill in shadows.
How to Choose the Right Size and Placement
A common sizing rule: add the room’s length and width in feet, then convert that sum to inches for the fixture diameter. For a 12-foot by 14-foot kitchen, that’s 26 inches. In practice, most farmhouse flush mounts range from 12 to 18 inches in diameter, large enough to provide adequate light without dominating the ceiling.
If your kitchen is longer than it is wide, consider two smaller flush mounts instead of one large fixture. Space them evenly, leaving at least 4 feet between fixtures and 2 feet from walls. This approach prevents dark corners and works well in galley or L-shaped kitchens.
Ceiling height affects perceived size. An 18-inch fixture feels proportional in a kitchen with 10-foot ceilings but might overwhelm an 8-foot room. In lower spaces, stick to 12 to 14 inches and opt for lighter finishes, white, brushed nickel, or pale wood, to keep the ceiling feeling open.
Placement over islands requires careful thought. If the island is used primarily for prep work, a flush mount can provide ambient light, but you’ll likely need task lighting underneath or from pendants. If the island includes seating, mount the flush fixture toward the work side, not directly over diners’ heads. Building codes typically require at least 30 inches of clearance above any countertop surface, though flush mounts rarely violate this since they hug the ceiling.
Measure your ceiling box location before buying. Older homes sometimes have off-center junction boxes, which can throw off symmetry. If the box is more than 6 inches off-center, consider having an electrician install a new box, or choose a fixture with a wide canopy that can conceal minor misalignments.
Installation Tips for DIY Homeowners
Before starting, shut off power at the breaker, not just the wall switch, and verify it’s off using a non-contact voltage tester. Most kitchen circuits run on 15 or 20-amp breakers: check the existing fixture to confirm wire gauge and box capacity.
Remove the old fixture and inspect the ceiling box. Standard round pancake boxes (½-inch deep) work for lightweight flush mounts under 5 pounds, but most farmhouse fixtures with metal cages or glass shades weigh more. If the existing box is plastic or loosely attached, upgrade to a metal ceiling box rated for 50 pounds and secured to a joist or blocking. This is especially important if you’re installing a semi-flush with a heavier shade.
Farmhouse fixtures often use exposed bulbs or decorative sockets, so wire nuts and connections will be visible inside the canopy. Take time to twist wire nuts snugly, loose connections cause flickering and heat buildup. Match wire colors: black (hot) to black, white (neutral) to white, and bare copper (ground) to green or bare. If you encounter old cloth-insulated wiring or aluminum wire, call a licensed electrician. Aluminum wiring requires special connectors and techniques beyond typical DIY scope.
Most flush mounts attach via a crossbar and mounting screws. Align the crossbar perpendicular to the ceiling joists for maximum support. If the fixture includes a decorative finial or cage that screws on after wiring, don’t fully tighten the canopy until you’ve test-fitted the shade, some designs require slight adjustments to align properly.
PPE: Wear safety glasses to protect against falling debris and dust, and use a sturdy stepladder with a wide base. If the fixture uses glass shades, handle them carefully: farmhouse-style seeded glass can chip or crack if bumped against the ceiling.
After installation, check for even light distribution. If the fixture casts harsh shadows or uneven pools of light, the issue is usually bulb wattage or placement. Swap in dimmable LED bulbs (typically 800 to 1,100 lumens for ambient kitchen lighting) and install a compatible dimmer switch. Verify the dimmer is rated for LED loads, older incandescent dimmers can cause LEDs to flicker or hum.
Mixing Farmhouse Flush Mounts with Other Kitchen Lighting
Flush mounts provide ambient lighting, the overall wash that makes a room usable, but kitchens need layers. Pair flush mounts with under-cabinet LED strips (look for color temperatures around 3000K for a warm white that complements farmhouse finishes) to eliminate shadows on countertops. Hardwired strips are cleaner than plug-in models, but both work if you’re avoiding electrical permits.
Over islands or peninsulas, many designers from sources like Houzz recommend pendant lights for task and visual interest. If you’re using both pendants and a flush mount in the same kitchen, keep finishes and materials consistent, matching metal tones or repeating glass textures ties the layers together. For example, if your flush mount has a matte black cage, echo that finish in black pendant shades or cabinet hardware.
Recessed cans add focused task lighting near the range or sink without competing visually. Use 4-inch retrofit cans with narrow flood beams (40-degree spread) to target specific work zones. Avoid mixing warm and cool color temperatures: stick to 2700K to 3000K across all fixtures to maintain a cohesive farmhouse warmth.
In open-concept layouts, use flush mounts to bridge kitchen and dining zones. A matching or complementary fixture in the hallway or mudroom creates flow without repetition. For example, if the kitchen has a wire cage flush mount, a simpler drum shade in the same finish works in adjacent spaces.
Don’t forget natural light. Farmhouse kitchens often emphasize windows and open sightlines. Position artificial lighting to supplement, not replace, daylight. A flush mount centered in the room provides evening coverage, while under-cabinet and pendant lights handle task needs throughout the day.
Materials and Finishes That Enhance the Farmhouse Look
Oil-rubbed bronze and aged brass bring warmth and a lived-in feel. These finishes develop subtle variations in tone, which suits farmhouse authenticity. They pair well with stainless steel appliances and natural wood cabinetry, bridging the gap between rustic and modern.
Matte black is everywhere in 2026 farmhouse kitchens, and for good reason, it’s bold without being flashy. A matte black flush mount stands out against white shiplap or beadboard ceilings while tying into cabinet pulls, faucets, and range hoods. It’s also forgiving: fingerprints and dust are less visible than on polished chrome or brushed nickel.
Galvanized steel and zinc finishes reference barn and agricultural roots. These work especially well in working farmhouse kitchens or spaces with reclaimed wood elements. Be aware that unsealed galvanized finishes can develop a patina over time, desirable for some, less so if you prefer a consistent look. Clear-coated versions resist tarnishing.
White and cream powder-coated metals suit lighter, cottage-style farmhouse kitchens. They blend into white ceilings but still provide subtle texture through cage patterns or scalloped edges. Powder coating is durable and resists chipping better than paint, important in kitchens where heat and moisture fluctuate.
Glass shades, whether seeded, clear, or milk glass, should be rated for damp or wet locations if installed near sinks, dishwashers, or ranges. Check the fixture’s UL rating. Most residential flush mounts are rated for dry or damp locations, which covers most kitchen applications, but avoid installing directly above a sink unless the fixture specifies wet-location approval.
Wood accents add warmth but require maintenance. Natural wood will darken or fade depending on sunlight exposure and humidity. Faux wood or distressed painted wood finishes offer the look without the upkeep. If using real wood, choose hardwoods like oak or walnut, which hold up better to temperature swings than softer pine.
Finally, match your finish to existing hardware. If cabinet pulls, drawer slides, and faucet are brushed nickel, a brass flush mount will feel out of place unless you’re intentionally mixing metals, a trend that works when done deliberately, using no more than two to three metal finishes in the same room. Resources like The Kitchn often highlight successful mixed-metal approaches in farmhouse kitchens, pairing warm brass with cooler stainless or black.


